Showing posts with label how to. Show all posts

August 2, 2012

Quick "How to Can" tips and borscht!


Its crunch time to prepare for baby. 

 I am due in 2 Days!!
whoa.

So made a big pot of borscht and canned it up.
cuz I don't want to be eating kraft dinner every day if I end up with a cesarian to heal from... 
that's another story. 


here is a link to my borsht recipe 
- this is beet borscht.


I enjoy canning things now that I get how it all works!
If you're scared of canning (like I was) and want some encouragement so you can finally try it, Here's a couple tips ( for pickles, jams and soups):

- Prep the thing to be canned and have it hot for the canning process
- wash the jars/lids, then put em in boiling water bath to sterilize for at least 10 minutes.
(Don't have to bring out the massive canner every time...  can just use your largest cooking pot)

- Having these three items will make the job more enjoyable and your fingers less burnt!!

                     funnel                                        hot jar lifter                                   magnetic lid lifter

- you can buy them in a kit

- so then, use your jar/lid  lifter to get the sterilized jars out of the boiling water bath
- empty jar of water, put the funnel on top and scoop the special sauce into the jar
- with a clean rag, wipe the rim and place the lid on top
- to be sure you will hear all those lids pop, "process" the full, lidded jars in the boiling water for 10 minutes 
*certain items must be processed for longer like canned tomatoes which you basically cook inside the jar.  Look at a canning recipe for your project, these are just basics.


This is my Gramma Dorothy with her new baby.


My Gramma Margaret talks about canning.
" I used to can Everything. Meat, Rhubarb, fruit, everything from the garden...
After we got married and then we could afford jars...  "

Imagine not being able to afford jars. 

I am grateful!


Happy canning! 


any tips/stories to share?


March 26, 2012

how to make toddler pants from a t-shirt

Stevie had a shirt from his roaring fun early 20's that he had been hanging onto for sentimental value.
Almost too tattered to wear.
but how could he throw it away? he hesitated, 
holding it over the box destined for salvation army..

SO I figured, I'll make it into something else!
Pants. For Attie.
Cuz that's the thing I know how to sew the best...


This is my pants pattern.  cut out from another pattern, using christmas wrapping paper!


Firstly, cut out two of this pattern.
I cut out 4 because I lined them with white cotton jersey.

I cut and flipped the top so there'd be a white band.
Sew that back up, press seams.


Sew the length each of the pant legs,
then flip one inside out,
and and place one leg inside the other leg,
right sides together.

Sew from crotch to top on either side.


then fold the top down leaving plenty of space for the elastic you will use,

sew almost all around, leaving a few inches to insert the elastic.
Put a safety pin on the end of the elastic and string it through.
sew the elastic ends together close up the hole.

I made a pocket (which gets sewn on before any leg sewing)

finish the bottom with a blind stitch - if you want a nice edge for folding up the bottom.
cut off all the stray thread ends,


  et voila!


Little hipster, daddy shirt pants!


They make her dance and move so fast I couldn't even get a good pic!
I'll get one later!


Cutie pants!


Wanna try pants?

Here's a tutorial for some drawstring toddler pants at Prudent Baby.

and here's a previous post of mine with more pants tutorials!~


December 1, 2011

how to infuse oils

This day some more Calendula-Chamomile oil infusion is in order.  
This will be used to make more Calendula Salve, lip balm, and Soap! as I did for the Santa Supermarket. Which went pretty good. 
Although there was lots left over, so I am doing another craft faire and need more supply.
  Today, I am using heat to infuse the flowers.

How to infuse oils with heat:
- fill an oven proof bowl/ vessel with the herb - calendula, chamomile and Chickweed used here
- completely cover with olive oil  - or jajoba, coconut, sunflower, sweet almond,...
- put in oven preheated to about 225 degrees for 4 hours- too much heat will make the oil turn rancid
- let it cool a bit until you can handle it, then strain with a cheese cloth.
- enjoy the glorious smell.  I just WISH I could send you the sweet scent over this blog post!


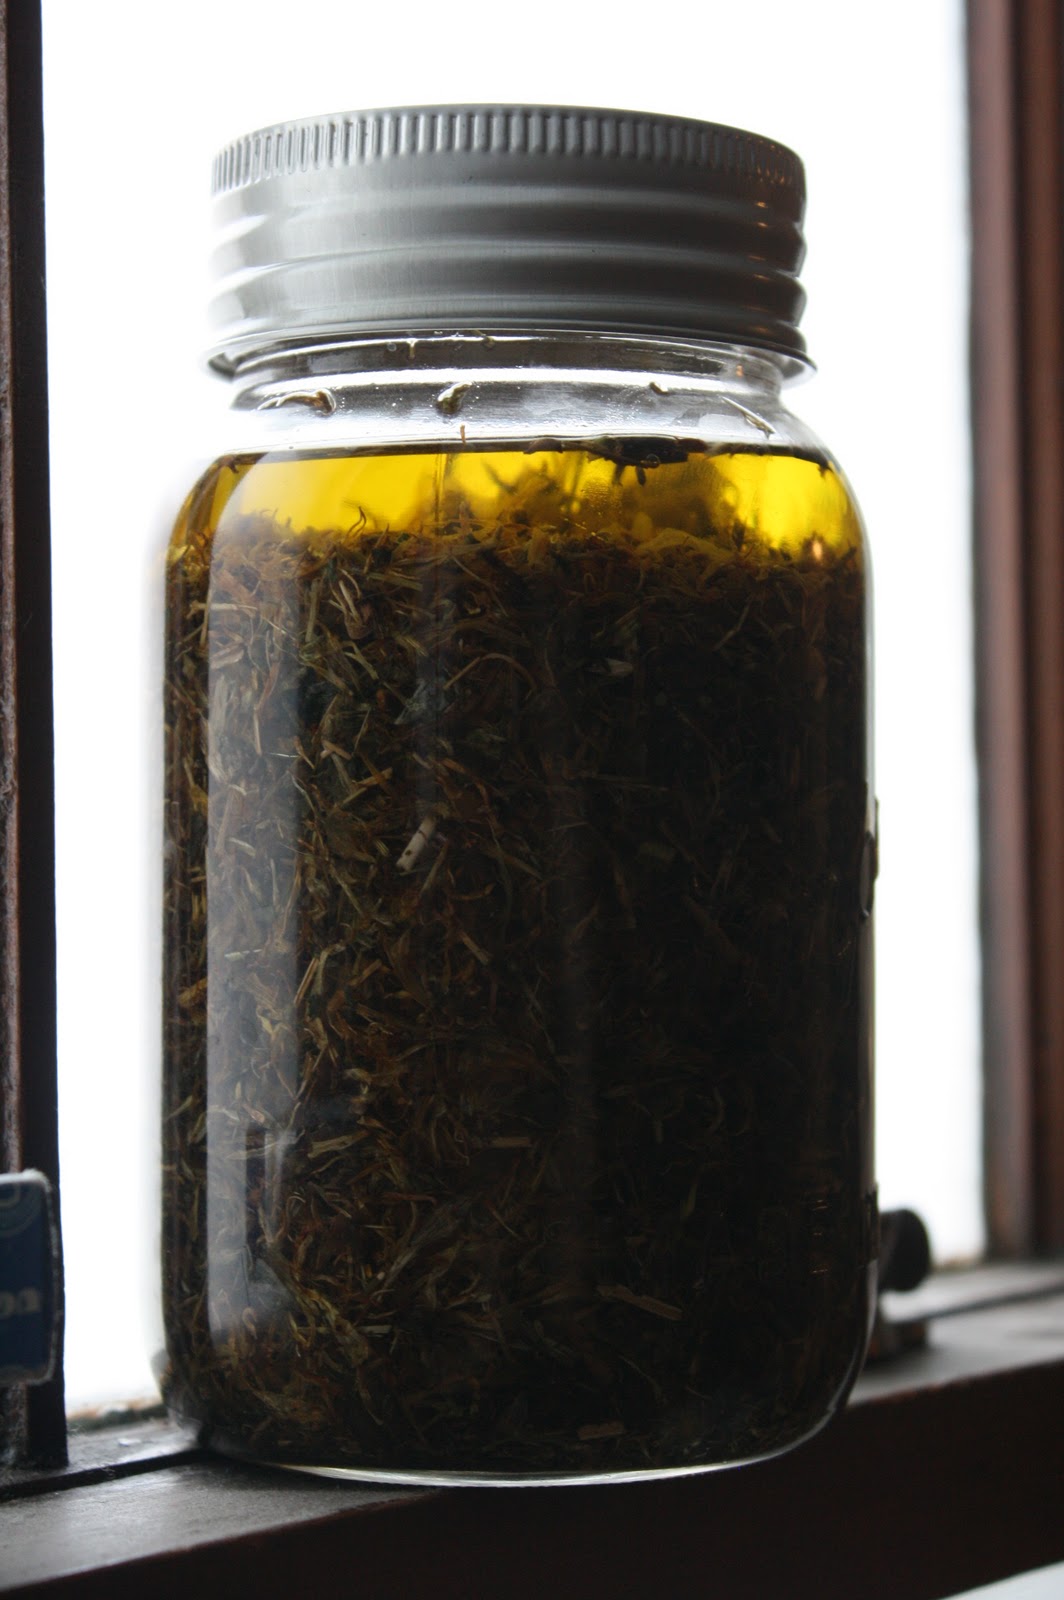
This is how to make a solar oil infusion:
- Fill a mason jar with calendula (chickweed, comfrey and chamomile are also good for skin)
- cover with olive oil (or sweet almond oil, sunflower, grapeseed...)
- let it sit in a sunny window for 3-4 weeks.
- Strain the oil out of the herbs with cheese cloth.


straining with the cheese cloth


this is gets messy and the smell is WONderful!   AND your hands will be baby soft for days.


oil.


I am using most of this today for my calendula skin saver salve:


Here is why to use calendula oils on your skin.


Green & Natural Mama Thursday @ I Thought I Knew Mama


June 15, 2011

a toddler dress from an adult shirt


my friend got some shirts made with her artwork on them.
I took one for myself and a couple extra to make our daughters some little sundresses!
(our babies are 2 months apart)


pretty simple.
I just copied a dress that fits her,
and it was 3 seams to sew up.
then i added a brown bottom strip.


this is far too cute.


here's Coral's dress!!


chamomile makes me smile.


June 10, 2011

How to bake bread!


Sunflower Millet Bread!


To have the house smelling like baking bread is a wonderful thing. Especially on a rainey day.


SO.

to start, combine

:1 cup of lukewarm water {the SAME temperature as your Wrist.}
: 2 tbsp of yeast
: one drop of honey, molasses... sweetener
let stand for 5 minutes.


next, you prepare "The Sponge"

by adding 1-2 cups of flour to the yeast water - in a big bread making bowl.


mix it all up


you may have to get your hands in there briefly.


let that rise 30-60 minutes,
here's my risen sponge:


while it is rising, you can prepare "The Mix"
which in this case is

: 1 cup of cooked (in 1 1/2 cups water) Millet
:1/2 cup sunflower seeds (cooked with millet)
: 2 tsp salt
: 1/4 cup butter
: 3 tbs honey


this is yummy just as it is!!

When the sponge has risen and the mix is room temperature,
mix the two well.
"sometimes the sponge and mix will resist each other at first. Keep mixing patiently until they merge" - molly katzen


now measure out how much flour the recipe claims you can put to the dough
and see how much you can actually get kneaded into it!

I will not lie, I can usually only get 3/4's the flour in my dough that they call for!! and it works out.
I am pretty sure this is because I use different types of flour, not just white... so I think these heavier flours take up more of the moisture. the easiest loaf to make is an all white one...
but you know how much nutrition that is lacking!

knead knead knead.


slowly adding flour and knead it in until its a nice uniform dough ball.


It is hard work!
Just think of them tough pioneer women with the 12 children who had to bake bread every day to feed the family. TOUGH women bake bread.
I want pipes like that.

but if the man (or a friend) is around, try to trick them into kneading a bit! ;0)


this is an example of kneading from utube:


although as you can see, she is just using white flour so it looks really easy. but you get the point!

everyone develops their own kneading style.
I think of kneading as pushing the dough into itself, flipping it and doing it again.

"remember, you are guiding the dough, making suggestions to it~ not forcing it, tearing it, or otherwise employing intimidation" -Molly K.


....and then my hands were all floured up and too messy to pick up my camera to document the rest of the process... so here it is without photos.

once you've kneaded all the flour in and then kneaded about 10 minutes more - you are satisfied with the uniformness of your living lump,

-wash out that bowl that you made the dough in and put about 2 tbsp's of oil in it.

-throw the dough in the bowl, roll it in the oil and put a clean, moist dish towel over top.

- place it in a warm spot to rise for an hour or until it is about doubled

1 way to make a warm environment for rising dough is:
put a pan of very hot hot water on the bottom rack of the cold oven
and place your covered bowl on the top rack to rise. thats enuf

-once it has risen, take it out and give it a punch (THWAP)!

-cut it into 2 chunks (for 2 loaves)

- roll it flat into a rectangle

-roll up the rectangle (like a jelly roll)

-turn the side bottoms under

-place in a greased and floured bread pan

- let those two bread pans rise until doubled or so

- preheat the oven 15 minutes before its time to put the bread in

- bake. usually 30-40 minutes at 350.

-go outside and come back in so you can take in the aroma of your house!


- the bread is done when you give it a tap tap and it sounds hollow.


howly crow its good. and good for ya.


A fool proof way to learn to bake bread can be found inside
Molly Katzen's cook book - the Enchanted Broccoli Forest.
The most beautyful thing: An Illustrated guide on how to bake bread! Without that, I am not sure I'd have ever made it to the other side of breadmaking.


This is what the breadmaking guide looks like:


yep.

happy baking!


May 30, 2011

baby wipes solution recipe


A tried and true solution for cloth baby wipes


for an 12 oz container:

2 tsp Dr. Bronner's Pure Castile Soap
(baby mild but NOT peppermint!)
1 tsp olive oil
1tsp baking soda
10 drops lavender oil
15 drops tea tree oil
fill the rest with water

this solution has the "slide" effect that disposables have because of the oil,
is antibacterial and smells great...

it makes the diaper pail and baby room smell considerably better!

I've been using it at home since little A was born and I loves it.

Dr. Bronner's Pure Castile Soap is a necessity in our home. We use it for so many things. Bath soap, diaper wipes, hand wash soap,... It is fair trade, has mostly all organic ingredients, and very few ingredients! I give it a 2 thumbs up.
It can be purchased at any natural food store.

If you don't have dr. bronner's soap, use the purest soap, with the least additives and scents that you have.

store the wipes with solution in your old disposable wipes container.
or just spray the wipes one at a time.


May 14, 2011

petal minty goodness tea


This is a tea blend I always have on hand:


including (clockwise) :
starting at the bottom
3 parts mint,
1 part oatstraw,
2 parts nettle,
1 part calendula,
and 1 part raspberry leaf.

they all have their purposes. It is a very healthful tea.


Chamomile is also nice for flavor as well as health.


this jar is on the stove for easy access.


then throw a couple tsp.'s of tea into the brewt
- one of the best tea making systems in the whole world.


The tea and hot water go in the top compartment.
then the brewed tea strains through a nylon filter
and pours out the bottom right into your mug!


attie reads the bug book to me while I fiddle about the kitchen making tea.


There's usually some left over-or more made for iced tea...


In a jar in the fridge with a bit of agave nectar (my new sweet love)


bubba geed loves to drink it, makes me smile cuz she's not hooked on juice!


tis refreshing


ps-


April 2, 2011

cutie pants


Attie has some new pants,
because some motivation passed my way this morning.

These particular pants are made from a brown linen skirt I got for one dollar at a thrift store.
The ankles are elastic'd because she is learnin to walk these days
and I don't want her to trip on her new big pants.

I love making kiddles pants.
They're take very little time and fabric with such cute results.

here are some pants we made for our little buddy Fynn:


he gets a little moose.

There are some wonderful tutes about making pants.

Here are Solveig's "10 minute trousers" at Randomness by Petchy.

Here is Amber's free pattern for baby pants at Make Baby Stuff.com

And Rae's great Basic Newborn Pant tutorial at MAde by rae.
also her tutorial for tights.
She's selling an awesome pattern for Big butt baby pants. Perfect for cloth diaperers!


cheers to baby butts.


March 19, 2011

Darn socks!


I bet you are the same as me and have some socks in the back corner of your drawer with holes in them... They are too nice to chuck so you are saving them for when you learn how to Darn?!

Mindy, at ZigZag stitch has a great tutorial!


I'm going to search for holy socks


Related Posts Plugin for WordPress, Blogger...