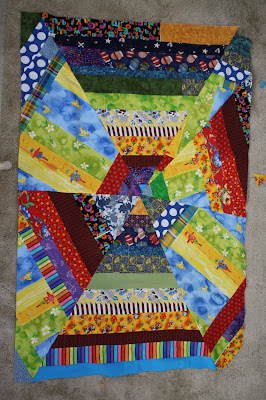
Baby Hyden is born!!
He was born on the first day of March...
so I have this fresh motivation to finish his little quiltie!
Here was the: inspiration
so where did I leave off?
the triangles. I cut these out of the panels I made...
that was back: here at the beginnings

He was born on the first day of March...
so I have this fresh motivation to finish his little quiltie!
Here was the: inspiration
so where did I leave off?
the triangles. I cut these out of the panels I made...
that was back: here at the beginnings

all 60 degrees.

6 of them. 2 of them are 27" high and 4 of them are 30" high.
lay them out and arrange them to see how they fit together the best.
note that the 27" triangles are the top and bottom of the quilt.
the 30"triangles are the sides.
lay them out and arrange them to see how they fit together the best.
note that the 27" triangles are the top and bottom of the quilt.
the 30"triangles are the sides.
top
then sew three of them together, right sides together starting from the center point going out.

When you've sewn the three together, make sure that they make a straight line.
This is half of the quilt.
I had to add a little extra triangle because somehow mine wasn't a straight line in the end...
(but there was plenty of good scraps to use for this from the
panels I cut the triangles out of)
Then I just cut off extras.
This is half of the quilt.
I had to add a little extra triangle because somehow mine wasn't a straight line in the end...
(but there was plenty of good scraps to use for this from the
panels I cut the triangles out of)
Then I just cut off extras.

now sew the other three together - the other half of the quilt.
so you will have two kind of equal sides. Make sure they are straight.
the longest straight edge I had was these clear carpet mats. They worked well!
now line them up, right sides together. flattening and straightening them from the center out until you are happy with them. pin it up and draw a straight line to sew along.

I was nervous to sew these two together...

but it worked out just fine!!
 unfolding this after sewing was pretty fun!
just like Christmas!
Now fold it in half, joining the top and bottom 27" pieces...
to quote the book:
"fold the quilt top right sides together in half lengthwise
thereby meeting right and left hexagon points"
I had a hard time figuring that one out at first, but now it makes perfect sense.

then fold I folded it again so it would fit on my cutting matt.
and cut (the sides) the points of the 30" triangles to make it square.

what?? cut all those lovely strips that took me days to make?
yes.
you will end up with lots of pretty offcuts...
looks to me like the beginning of a raggedy quilt!
Maybe a quilt for Murial Moss!

but it worked out just fine!!
 unfolding this after sewing was pretty fun!
just like Christmas!
Now fold it in half, joining the top and bottom 27" pieces...
to quote the book:
"fold the quilt top right sides together in half lengthwise
thereby meeting right and left hexagon points"
I had a hard time figuring that one out at first, but now it makes perfect sense.

then fold I folded it again so it would fit on my cutting matt.
and cut (the sides) the points of the 30" triangles to make it square.

what?? cut all those lovely strips that took me days to make?
yes.
you will end up with lots of pretty offcuts...
looks to me like the beginning of a raggedy quilt!
Maybe a quilt for Murial Moss!

Et, Voila!!!

the front panel is done.


No comments:
Post a Comment